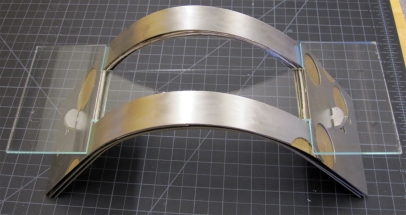
The aim of this project was to become familiar with the basic operations of the abrasive water jet cutter by assembling a steel and plywood table. While etching is possible, the basic abrasive water jet operation used was cutting.
To do this project you will need:
- 1 x Sheet of 1/36″ mild steel welding plate
- 1 x Sheet wood veneer or 1/36″ plywood sheet
- 1 x Braided steel cable (approx 1/36″ diameter)
- 1 x 1/8″ acrylic sheet
- Wood or plywood for bending jig
- 1 x Waterjet cutter
- DWG file with design
- 3 – 5 hours
Steps:
- Cut steel plates
- Cut cable tabs
- Assemble jig for bending
- Bend steel and wood pieces
- Optional: Stain wood, brush steel)
- Cut acrylic tabletop
- Assembly
1. Cut steel plates
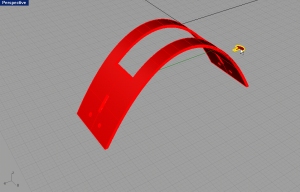
For this exercise three steel plates of approximately 4″ x 16″ were cut with the abrasive waterjet cutter.The dimensions of all the lates differ slightly to account for the geometry of the design. The top plate includes holes to reveal the second layer of veneer.
The design work was done in Rhino after which the cut file was exported as a dxf.
Cut paths and lead-in and lead-out settings, were set in OMAX LAYOUT after which the file was exported to be read in OMAX MAKE which serves as the cutter interface.
 To download cut file click here.
The settings for the cut were Mild steel with 1/36″ (0.03) thickness. The total cutting time for this project was 16 minutes with lines set at quality 3.
Video of abrasive water jet cutter cutting
2. Cut cable tabs
Tension in the final product is produced by connecting the two ends of the steel sheets with a tension cable. The cable connects to the sheets by means of two laminated acrylic tabs. These tabs were cut on a universal laser cutter with the surfaces later covered with mild steel cover plates.
3. Assemble jig for bending
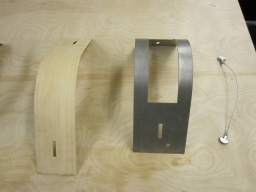
In order to bend the steel plates accurately a plywood jig was built. This was to ensure that an accurate bend could be made without accidentally distorting the steel sheet while bending it. Since permanent deformation of the sheet will occur when bending it past the elastic region it is important to make the first bend accurate so that the secondary sheets can have the correct curvature.
4. Bend steel and wood pieces
The steel pieces were bent over the jig. The veneer and plywood sheets were submerged in water to increase the elasticity and and then bent over the steel sheets.
5. Optional: Stain wood, brush steel)
As and experiment the top steel sheet was brushed to create a ‘brushed steel’ effect. The second layer (wood veneer) was stained using a commercial acrylic teak wood stain.
A Dremel tool with wire brush was used to brush the surface.
Brushed steel surface.
6. Cut acrylic table top
For the tabletop, a sheet of clear acrylic was used. The sheet was cut down to the correct size using the universal laser cutter.
7. Assembly
The table was assembled by bending placing the bottom steel sheet in tension and then adding each layer one by one, incrementally increasing the tension in the cable.


